![Projul Logo 345PX wide.png]](https://knowledge.projul.com/hs-fs/hubfs/Projul%20Logo%20345PX%20wide.png?height=40&name=Projul%20Logo%20345PX%20wide.png)
You can watch the video below for a complete overview of estimating, or continue reading for detailed written instructions.
How to edit cost lines
There are two ways for your clients to view your estimate:
- Itemized (where they can see each separate line item)
- Non-itemized (where they only see the section title and the cost)
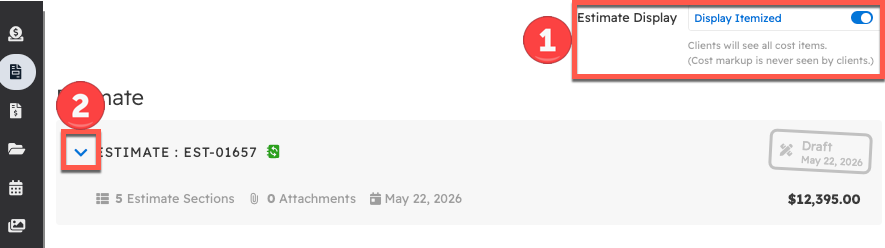
To get to the cost lines from the estimate, click on the highlighted area above (2).
Cost line overview:
This is where to edit cost lines and other aspects of the estimate.
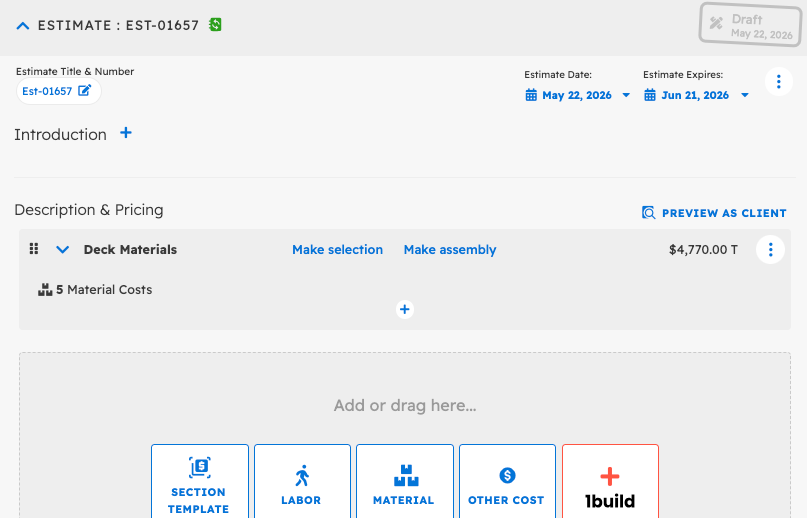
Right below the estimate name, you will see a set of inputs.
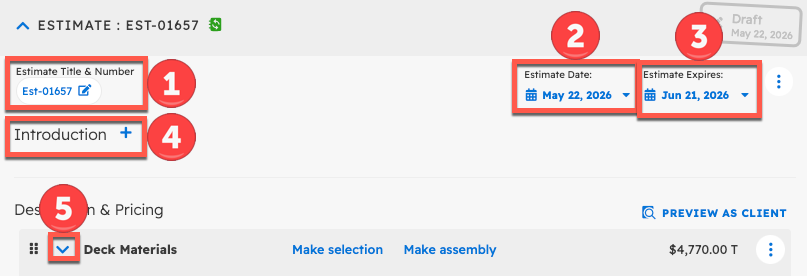
From here, you can edit the following:
- The title and number of the estimate
- Estimate date
- Estimate expiration date
- Estimate approval email introduction
- To access the cost lines, click on the highlighted area right below "Description & Pricing"
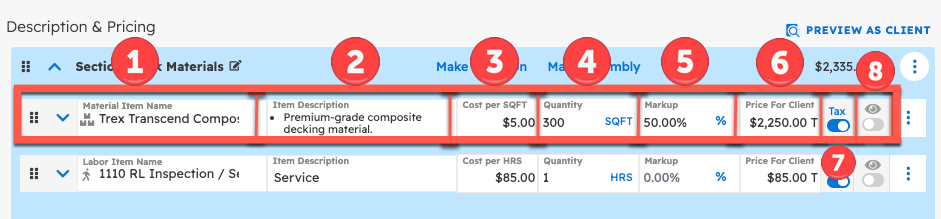
A cost line represents a cost like labor, materials, or a different cost. You can change the following:
- Item Name
- Item Description
- Cost per unit
- Quantity
- Markup/Margin
- Price for Client
- Whether tax should be applied
- Whether the client can see it
You can access the settings specific to a line item by clicking the arrow at the very left of a cost line item to expand it.
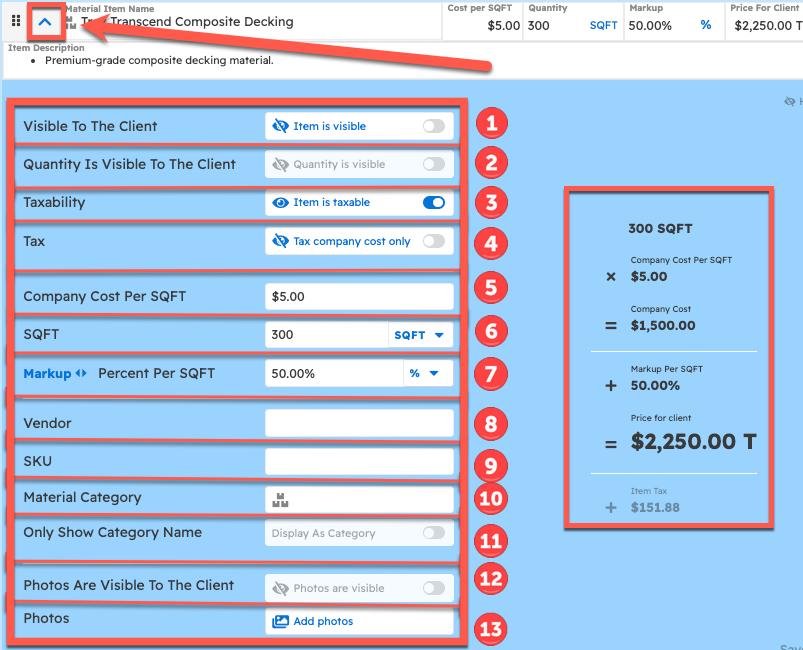
From here, you can:
- Choose whether the item is visible to the client
- Choose whether the quantity is visible to the client
- Choose whether the line item is taxable
- Choose whether the company covers the tax applied to the company cost
- Add the company cost per unit
- Add the quantity of units
- Edit the Markup/Margin
- Add a vendor
- Add a SKU
- Add a category of material
- Choose whether to show only the category name of line items in the estimate
- Choose whether the photos are visible to the client
- Add photos
At the right hand side, it shows the math going into how Projul generates the price for the client.
There are more settings in the 3-dot menu of the section. To get there, open the 3-dot menu in the top right corner of the section:
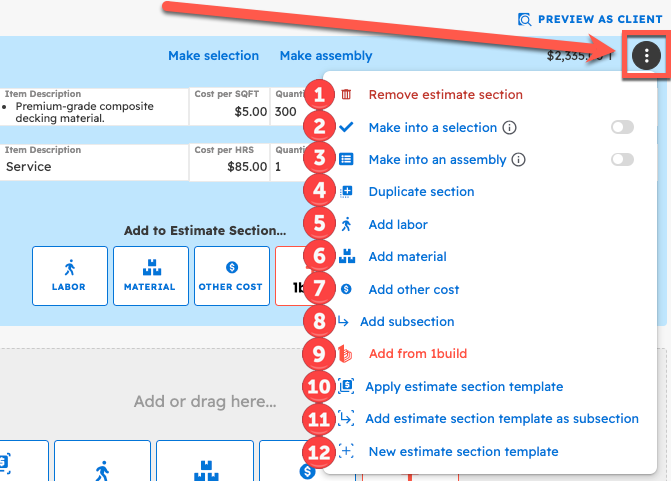
The different options here are:
- Remove the section ("Remove estimate section")
- To make it into a selection (learn more in the Selections article)
- To make it into an assembly (learn more in the Assemblies article)
- Duplicate the section
- Add a labor cost line item
- Add a material cost line item
- Add another cost line item
- Add a subsection
- Add a 1build line item (only with 1build integration)
- Apply an estimate section template
- Add an estimate section template as a subsection
- Save the section as a new estimate section template
Markup/Margin in cost lines
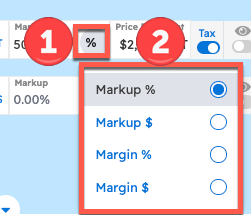
You can switch between markup and margin by doing the following:
- Click on the symbol next to the markup or margin value
- Choose whether you want to see Markup/Margin and % or $
Adding new line items
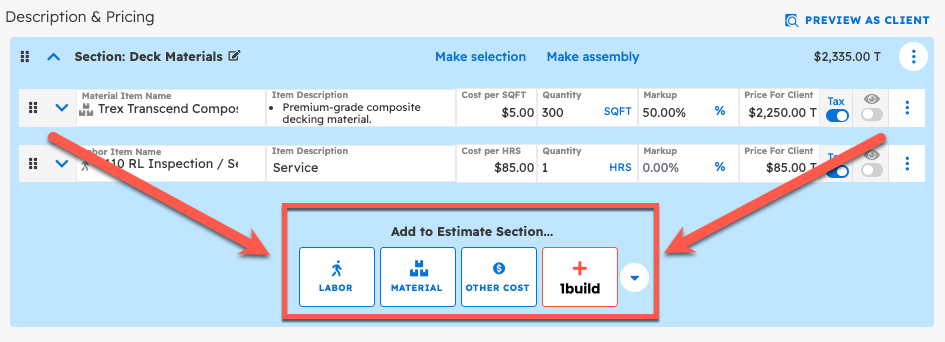
You can add new line items by clicking on one of the boxes in the highlighted area above. The options for line items are:
- Labor line item
- Material line item
- Other Cost line item
- 1Build line item (if you have the integration set up)
Subsections:
Subsections are sections in the main sections that help to organize your estimate.
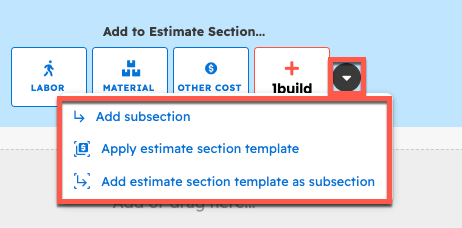
You can add a subsection by clicking the drop down arrow to the right of the "1build" button.
This will open a pop-up that gives you options of what to add to the estimate.
A subsection in an estimate looks like this:
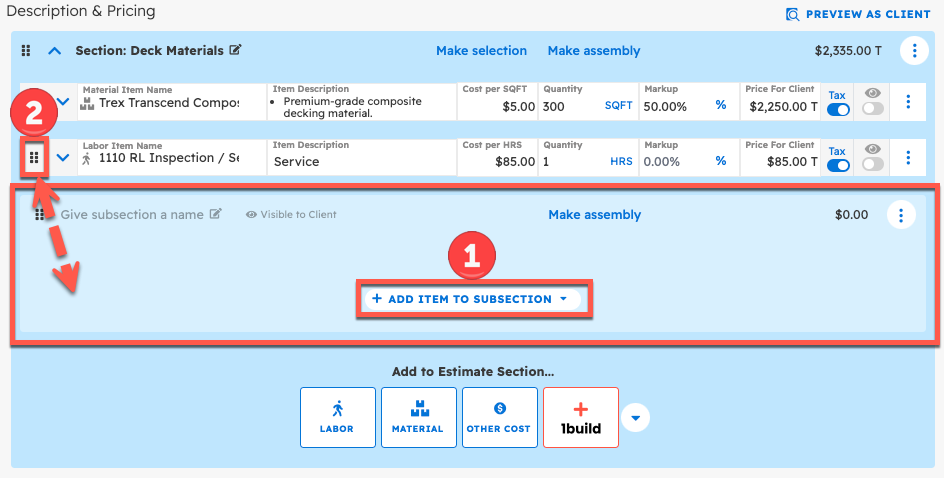
It functions as a normal section, and you can add line items to it by:
- Clicking on the "add item to subsection" button, or
- Simply clicking and dragging an existing line item into the subsection.
Questions? Let's Chat.
support@projul.com
(844) 776-5853