![Projul Logo 345PX wide.png]](https://knowledge.projul.com/hs-fs/hubfs/Projul%20Logo%20345PX%20wide.png?height=40&name=Projul%20Logo%20345PX%20wide.png)
You can upload photos to a task from the Projects page or from the Task List. Both ways are below.
The first way to upload photos to a task is on the projects page. To do so:
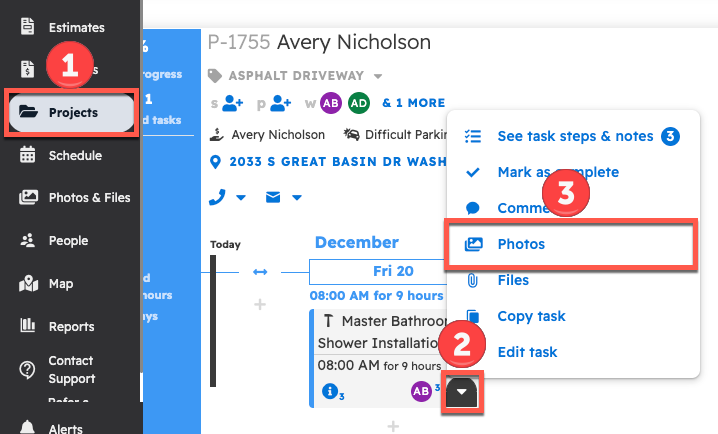
- Click on the "Projects" page
- Locate the task, then open the dropdown menu in the bottom-right corner of the task.
- Select "Photos" from the menu
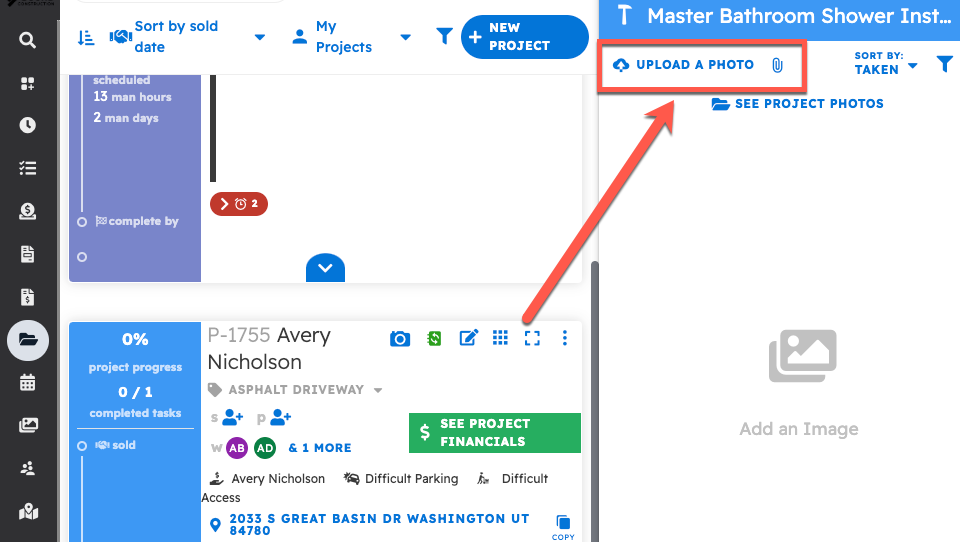
This opens a window to view existing photos or to upload additional photos by selecting "Upload a Photo."
The second way to upload a photo to a task is from the Task List.
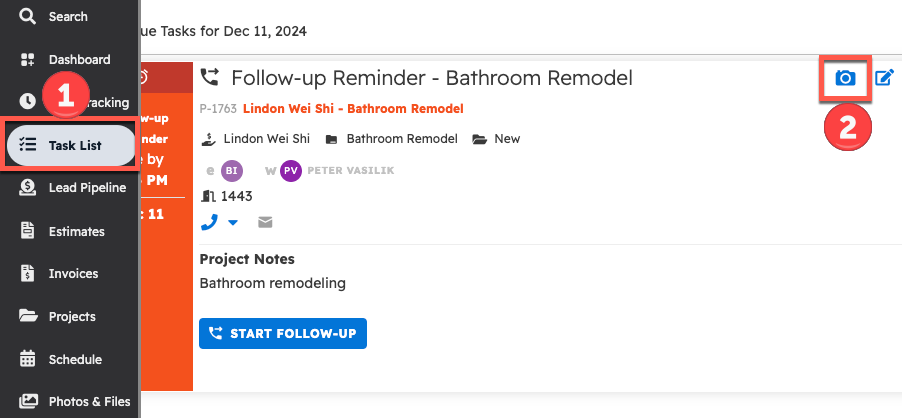
- Click on the "Task List" Icon
- Select the camera icon on the task to open the camera on a mobile device. On desktop, this opens the file manager to upload photos instead.
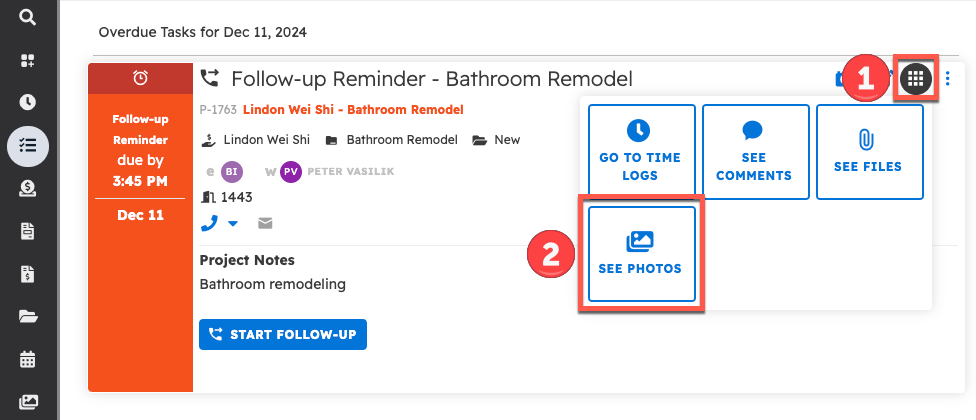
Similar to uploading photos directly to projects, the 9-square button in the top-right corner of the task card can be selected to choose "See Photos." From there, task photos can be viewed and uploaded.
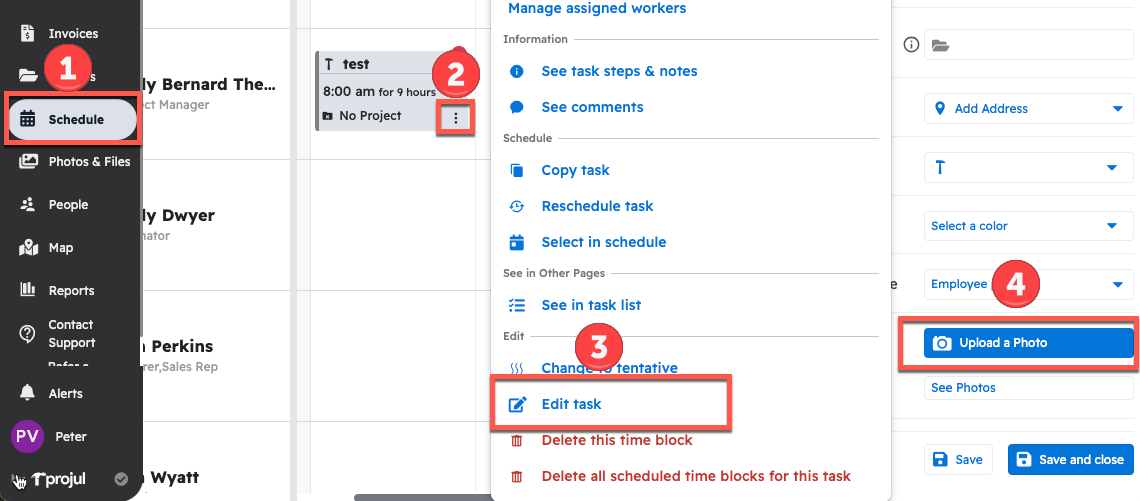
From anywhere else, open the task and select "Upload a Photo" at the bottom.
As long as a task is tied to a project, the photos uploaded to a task will be visible in the project's photos. To see how to access photos on projects, click here.
Questions? Let's Chat.
support@projul.com
(844) 776-5853